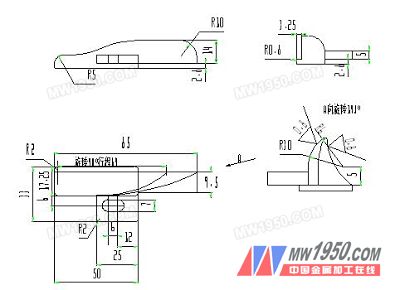
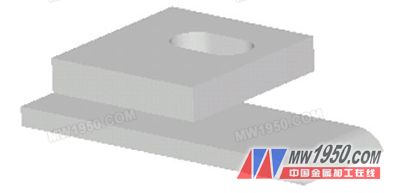
CAXA manufacturing engineer is the CAD/CAM application software of Beijing Digital Dafang Technology Co., Ltd. for CNC milling and machining center machine tools. It has excellent craftsmanship, high efficiency and easy learning, and provides simulation and design, processing code generation and machining simulation for CNC machining industry. Integrated solutions such as code verification are the real "brains" of CNC machine tools. The specific function of the CAXA manufacturing engineer is described in detail below with a factory application example—the right lower corner horn. Corner shape Two-dimensional view of the corner device First, the shape of the chamfer Modeling ideas: In the shape of the corner horn, only the bottom two cubes are solid, and the other parts are all made of curved surfaces. The two entities at the bottom can be done directly using the tensile feed. The styling of this example focuses on the above surface modeling. As seen from the top view, one surface is rotated by 90 degrees 64, so firstly, a rotating ruled surface is generated by using the cross-sectional lines of the two spaces perpendicular to each other by 64. The left side of the ruled surface (in the shape of the angler) is a flat surface that we can use with the scanning surface. The curved surface behind the ruled surface (still in the shape of the angler) is also scanned using the spline to obtain the scanned surface. Finally, surface extension and surface clipping in surface editing are performed to complete all surface modeling. 1.1 Solid shape at the bottom of the corner device 1. Click Plane XOY in the feature tree and the XOY face is the drawing datum. 2. Click the Sketch button 4. Click the Stretch button 5. Pick the upper surface of the box as the datum of the drawing and click the Sketch button 6. Press F5 to switch to XOY face display, click the "Rectangle" button 7. Click the "Isometric Line" button 8. Select the Delete and Crop command to remove the unwanted line segments. The result is shown in the figure. Exit the sketch editing state. Click the Stretch button 9. The entity transitions, the results are shown below. At this point, the solid shape at the bottom of the corner device is completed, and the surface shape is started below. 1.2 Generate a straight face 1. Click the Related Lines button in the Curves toolbar 2. Click the Curve Stretch button 3. Click the "Isometric Line" button 4. Press the F6 key to switch the drawing plane to the YOZ plane, then press F8 to observe its axis side view. Click the "Line" button, select "two-point line" and "orthogonal" mode, pick the intersection of line 2 and line 3 as the first point, press Enter to enter the coordinates of the second point (0,0,14) , get a straight line 5. In the same way, a straight line 6 of length 14 is obtained. 5. Click the Straight Face button 1.3 Generate a scanning surface 1. Press the F5 key to switch the drawing plane to the XOY side, then press F8 to observe its axis side view. Click the "Line" button, select the "angle line" and "X-axis angle" mode, pick the intersection of line 2 and line 4 as the first point, drag a distance and right click to get the line 7. In the same way, the input angle is 105 degrees, and a straight line 8 is obtained. Next page Anti-condensation Vacuum Glass
The key to building door and window energy saving is the reserch & development and application of new energy saving building glass. Vacuum glass has better thermal insulation performance, higher sound insulation performance, higher wind pressure resistance, longer service life and no respiratory problems. Environmental vacuum glass can save window frame materials and reduce construction cost. Vacuum glass for buildings is the best energy-saving building glass with thermal insulation and thermal insulation performance. Vigorously developing and applying energy saving vacuum glass is of great social significance to building energy conservation and the sustainable development of human society. ICESUN vacuum glass products have passed the American IGCC and SGCC safety certification. And tempered vacuum glass can realize no condensation because its condensation temperature is below - 50 ℃. Besides, we also provide Vacuum Glass For Cars, ship, skylight, greenhouse and so forth.
Anti-Condensation Vacuum Glass,Anti-Condensation Vacuum Composite Glass,Anti-Condensation Safety Compound Vacuum Glass,Anti-Condensation Safety Glass ICESUN VACUUM GLASS LTD. , https://www.icesunvacuumglass.com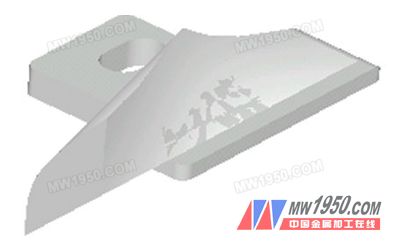
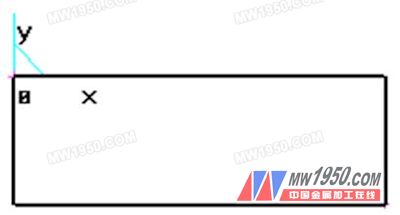
 , enter the sketch state.
  Select the "two-point rectangle" method, pick the origin (0,0,0) as the starting point, and press the Enter key to enter the coordinates of the ending point (50,-17.25). Exit the sketch editing state.
 In the pop-up stretch dialog box, enter a depth of 2.8, click OK, and press F8 to observe its axis side view.
 , enter the sketch state.
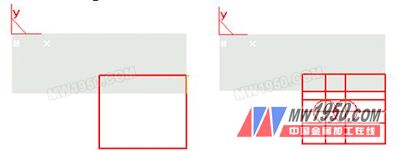
  , select the "two-point rectangle" mode, press the Enter key to enter the starting point coordinates (25, -33), the coordinates of the end point (50, -12), draw a rectangle.
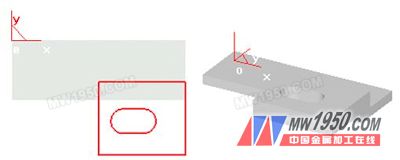
  According to the drawing size, draw the equidistant line as shown in the figure, then click the “Full Circle†button and select the “Center_Rel†method to draw the two circles as shown.
 In the pop-up stretch dialog box, enter a depth of 5, click OK, and press F8 to observe its axis side view.
 , select "Entity Boundary" in the immediate menu, pick the edge 1 of the bottom cube entity, edge 2, and generate a straight line 1, a straight line 2.
  , pick up the line 2, and extend the X-axis. Press the Enter key to enter the position coordinate (64,0) to which it is stretched, and stretch the line again to the point (82,0).
  The straight line 1 is extended by the X direction by equal distances 64 and 82, respectively, to obtain a straight line 3 and a straight line 4.
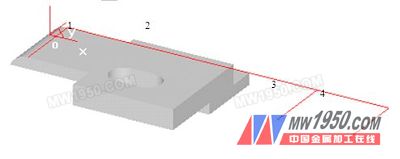

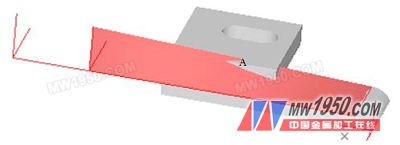
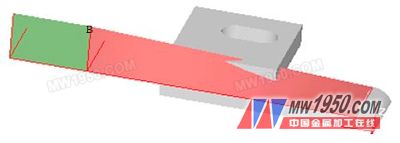
 First, pick up the straight line 1, and then pick up the straight line 5 to get the straight grain surface A. Picking up the straight line 5 and the straight line 6 gives the ruled surface B.